
How to Photograph the Milky Way Without a Star Tracker
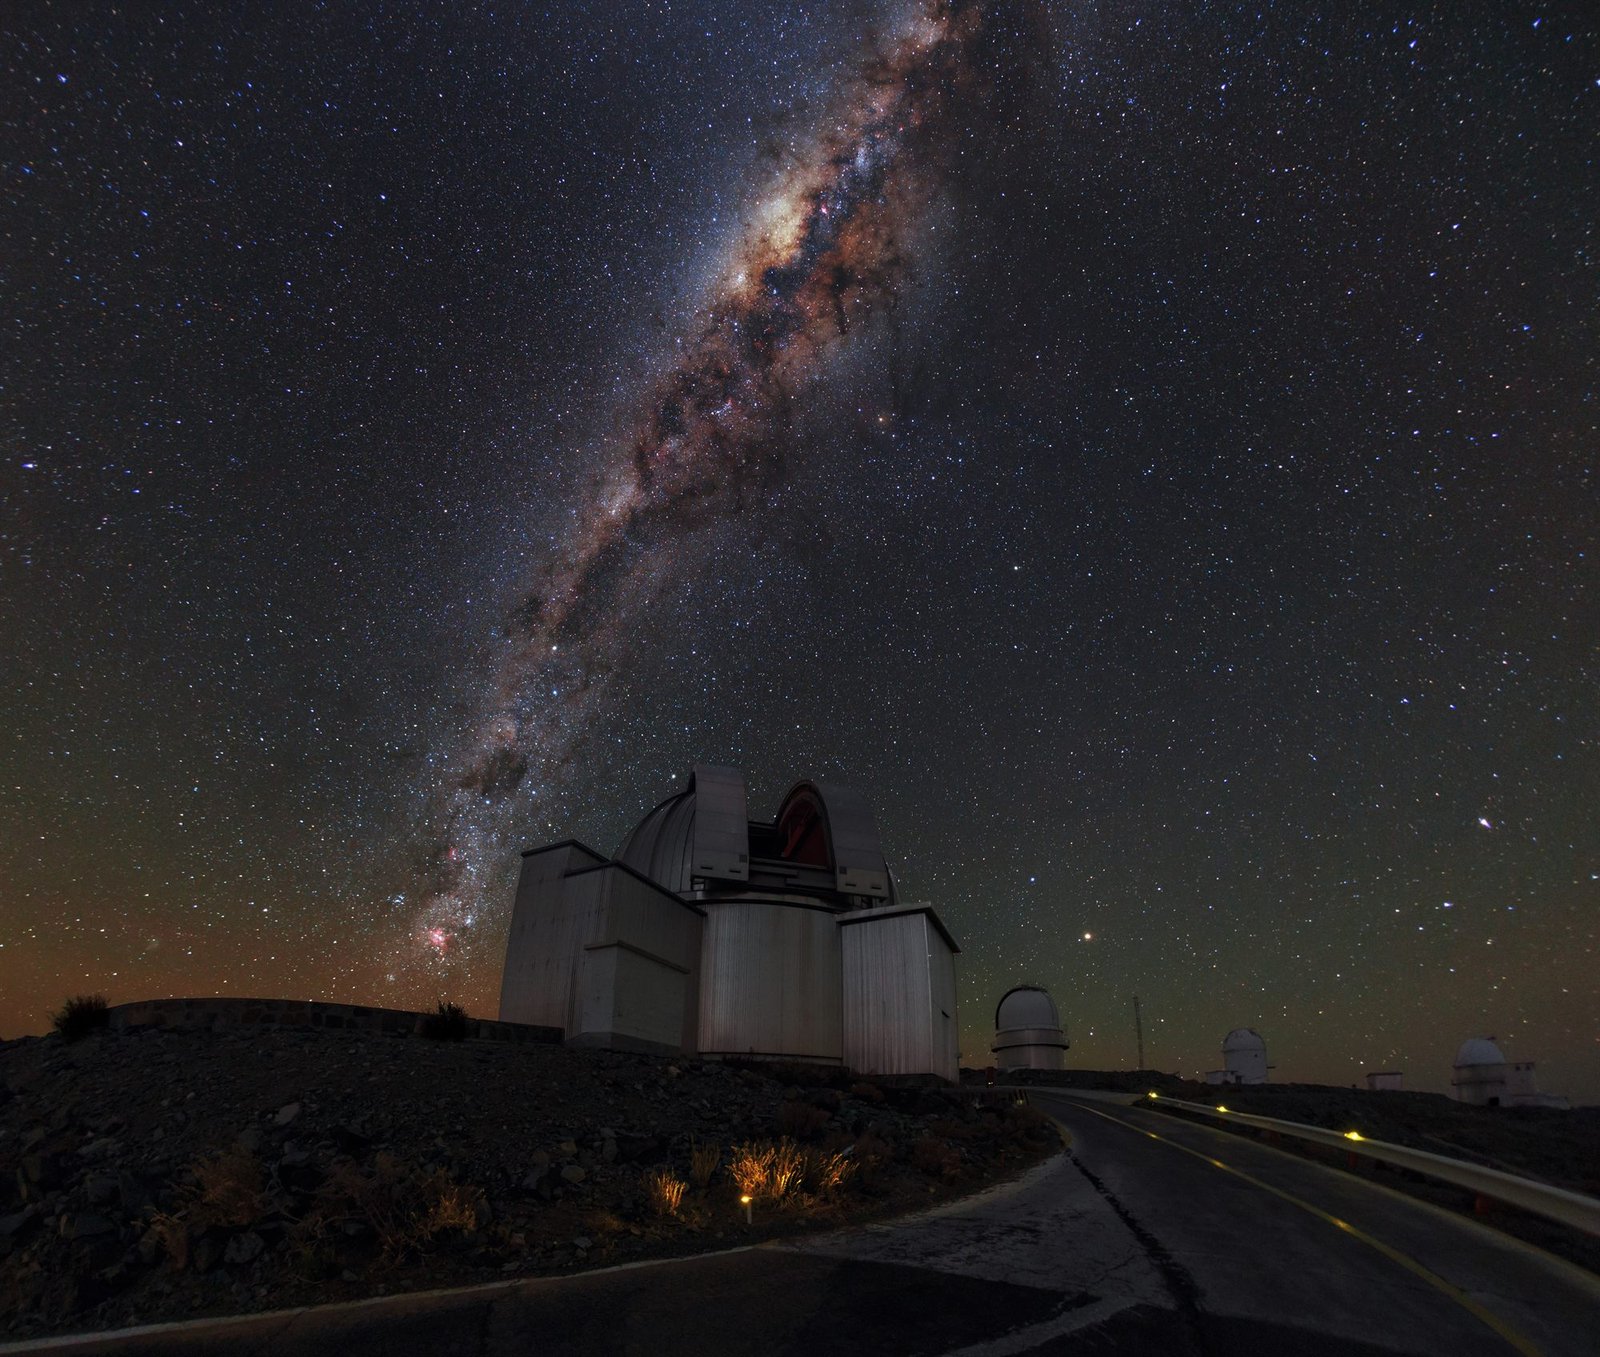
The Milky Way above ESO's La Silla Observatory in Chile. This image illustrates the subject and composition described in this guide; its own capture settings and tracking method are not documented by the source and aren't claimed here. Credit: ESO/B. Tafreshi (twanight.org), resized from the original. Licensed under CC BY 4.0.
You don't need a star tracker, a telescope or even a particularly expensive camera to get a real, recognizable photograph of the Milky Way. You need a camera that lets you control exposure manually, a reasonably fast wide-angle lens, a stable tripod, and a plan for when and where to point it. This guide walks through that plan end to end — from checking whether the galactic core will even be up, through focus and exposure settings, to a basic editing pass — aimed specifically at a first attempt with gear you likely already own.
What You Actually Need
The minimum kit is short: a camera with a manual exposure mode and the ability to shoot RAW (most mirrorless and DSLR cameras qualify, and a growing number of high-end smartphones offer a workable RAW/manual night mode), a wide-angle lens with a fast maximum aperture — something around f/2.8 or faster makes a genuine difference here, since you're racing against the sky's rotation for every extra second of exposure — and a tripod sturdy enough that it won't shift or vibrate in a light breeze over a several-second exposure.
Past that minimum, a short list of accessories make the session easier rather than strictly better: a remote shutter release or your camera's built-in exposure-delay/timer function (pressing the shutter by hand can introduce enough vibration to soften a long exposure), a headlamp with a red-light mode to protect your night vision while you work, spare batteries (cold nights drain them faster than you'd expect), and a lens hood or simple homemade dew shield if you're shooting somewhere humid, since a dew-covered front element will quietly ruin a session without any obvious warning until you check your images.
Check Whether the Galactic Core Will Actually Be Up
The single most common reason a first Milky Way attempt disappoints has nothing to do with camera settings — it's pointing at the sky on a night, or at an hour, when the brightest, most photogenic part of the galaxy (the core, toward the constellation Sagittarius) simply isn't above the horizon yet, or isn't up at a convenient time. Earth's position in its orbit determines when the core is visible at night at all, so this needs checking before you plan anything else.
As a general pattern: the galactic core becomes progressively easier to catch at a convenient evening hour as the months progress from late winter into the following autumn in the Northern Hemisphere, with the core generally sitting low toward the south for Northern Hemisphere observers. From Southern Hemisphere locations, the core passes much higher in the sky — closer to overhead rather than hugging the horizon — over a broadly similar stretch of the year, which is a meaningful practical advantage: a higher core means less atmosphere for that light to pass through, and it clears obstructions like trees, hills and buildings more easily. Treat both of these as general seasonal patterns rather than fixed calendar dates — the exact timing shifts with your specific latitude and the date, so it's worth checking directly rather than assuming last year's plan still applies. ORIVON Sightline and general planetarium apps (see ORIVON's planning apps guide) can both show you exactly when the core clears your horizon on a specific date.
The Moon, Clouds and Light Pollution Will Decide More Than Your Settings Will
Sky conditions matter more here than almost any camera setting choice. A bright Moon above the horizon during your session brightens the whole sky and washes out the galaxy's faint structure, the same way it does for visual deep-sky observing — a New Moon night, or a night where the Moon sets or rises well outside your shooting window, gives a meaningfully darker background for the core to stand out against. Clouds are an obvious problem, but thin, high haze can be a subtler one: it doesn't necessarily block the view outright, but it scatters light-polluted skyglow across the frame and softens contrast in a way that's easy to miss until you're reviewing images at home. Light pollution itself sets a hard ceiling on what's achievable — see ORIVON's Bortle scale guide for how much your specific sky darkness will cost you in visible detail, no matter how good your technique is.
Composition: Give the Sky Something to Anchor To
A frame that's entirely sky, with no landscape, tends to read as an abstract star field rather than a Milky Way photograph, even when the exposure and processing are technically solid. Including a foreground element — a tree line, a mountain ridge, a building, a person — gives the eye a sense of scale and grounds the image, and it's the single easiest change that separates a forgettable frame from a compelling one. Scout your foreground in daylight if you can, decide roughly where the core will rise or sit relative to that foreground (again, a planning app helps here), and consider shooting slightly wider than your final intended crop so you have composition flexibility later.
Manual Focus on a Star: The Steps That Actually Work
Autofocus reliably fails in near-total darkness, so this has to be done manually, and it has to be checked, not assumed. The process: switch your lens to manual focus, set it near its infinity mark as a starting point (not exactly on the hard-stop end for most lenses, which commonly focuses slightly past true infinity), point the camera at the brightest star or planet you can find, and turn on your camera's live-view screen. Zoom the live-view display in digitally as far as it goes on that bright point of light, then adjust focus slowly until the star shrinks to its smallest, sharpest point rather than a soft blob. Take a test exposure, zoom into the image on your camera's playback screen (not just the small preview thumbnail), and confirm the stars are tight points rather than soft or doubled. Recheck focus periodically through the session — temperature changes can cause some lenses to drift slightly as the night cools.
RAW, Aperture, ISO, White Balance and Shutter Speed
Shoot RAW, not JPEG — RAW preserves far more shadow and highlight detail for the editing pass later, and white balance in particular becomes a simple after-the-fact adjustment rather than a decision you're locked into at capture time. Shoot at your lens's widest usable aperture (often f/2.8, sometimes wider) to gather as much light as possible in a limited exposure time; if your lens is noticeably softer wide open, stopping down slightly (say, to f/3.2 or f/3.5) can trade a small amount of light for meaningfully sharper corners, which is often a worthwhile trade. ISO typically needs to run high for a fixed-tripod exposure — commonly somewhere in the range of ISO 1600 to 6400 depending on your specific camera's noise performance at high ISO, your lens's aperture, and how dark your sky is — and white balance can be left on auto or set to a fixed value like roughly 3800–4000K, since it's fully adjustable non-destructively in RAW during editing regardless of what you pick in-camera.
Starting Points by Focal Length and Sensor Size
These are starting points to dial in from, not fixed answers — treat every number below as a first guess to check and adjust based on your specific camera's histogram and noise performance, not a setting to trust blindly:
| Setup | Starting Aperture | Starting Exposure Time | Starting ISO |
|---|---|---|---|
| Full-frame, 14–24mm lens | f/1.8–f/2.8 | ~15–20 sec | 1600–3200 |
| APS-C / crop sensor, ~10–16mm lens | f/2.8 | ~10–13 sec | 1600–3200 |
| Micro Four Thirds, ~7–12mm lens | f/2.8 | ~8–10 sec | 1600–3200 |
Exposure times above already account for typical crop-factor star-trailing limits (see the next section) — they are intentionally shorter than a naive 500-rule calculation for the same focal length would suggest on a cropped sensor.
Why the 500 Rule Can Blur Your Stars
The widely repeated "500 rule" — divide 500 by your lens's focal length in millimeters to get a maximum exposure time in seconds before stars visibly trail — was built around 35mm film cameras and doesn't account for two things that matter a lot in practice: your specific sensor's crop factor, and how closely you'll actually inspect the image afterward. A 20mm lens on a full-frame body and the same 20mm lens on an APS-C crop body are pointed at a different effective field of view, and the crop sensor's typically higher pixel density makes star trailing show up sooner, at a shorter exposure time, than the plain 500-rule number predicts. A practical fix is to divide the 500-rule result by your camera's crop factor as well (roughly 1.5 for most APS-C sensors, 1.6 for Canon APS-C, 2 for Micro Four Thirds) before treating it as your ceiling — and even then, treat it as a rough starting point you verify by zooming into an actual test frame, not a guarantee.
The NPF Rule, in Plain Terms
A more precise alternative, called the NPF rule, factors in your lens's aperture and your camera's actual pixel pitch (the physical spacing between individual pixels on the sensor), not just focal length. Developed by Frédéric Michaud for the Société Astronomique du Havre, the formula is:
Exposure time (seconds) = (35 × aperture + 30 × pixel pitch in microns) ÷ focal length in mm
You don't need to calculate this by hand — several free NPF calculators online will compute it instantly once you enter your specific camera model and lens. What matters is the underlying idea: a wider aperture and a sensor with larger, more widely spaced pixels can both tolerate a slightly longer exposure before trailing becomes visible, which is why the NPF rule and the simple 500 rule can give noticeably different recommended exposure times for the exact same lens.
Checking Your Work in the Field
Don't wait until you're home to find out something went wrong. After your first few exposures, check three things directly on the camera's screen: focus, by zooming all the way into a bright star in playback and confirming it's a tight point rather than a soft or doubled blob; the histogram, making sure the data is shifted toward the left (astrophotography exposures are typically dark overall) without being crushed completely against the left edge, which would mean losing shadow detail to pure black; and star shapes at the frame's edges and corners, checking for elongated or trailed stars that would indicate your shutter speed was too long for the combination of focal length and sensor you're using.
Shooting a Sequence to Stack
A single frame of the night sky carries a meaningful amount of sensor noise, especially at the high ISOs a fixed-tripod Milky Way shot typically requires. Capturing a sequence of consecutive frames — commonly somewhere around 10 to 20 exposures of the sky at identical settings, back to back — and combining them in stacking software afterward reduces that random noise significantly, because noise is random from frame to frame while the actual star and nebula signal stays consistent, so averaging multiple frames together reinforces the real signal while smoothing out the noise. See ORIVON's stacking software guide for beginner-friendly options.
One important complication specific to a foreground-inclusive composition: stacking software aligns frames against the stars, which are moving slightly relative to your fixed tripod between exposures as the sky rotates — but your landscape foreground isn't moving at all. Stack a sequence naively and a sky-aligned stack will blur a static foreground (or a foreground-aligned stack will trail the stars). The common fix is to shoot two separate sequences — one set of frames for stacking and aligning specifically for the sky, and one or more longer, cleaner exposures of just the foreground at lower ISO — then blend the two in post-processing, rather than trying to stack a single sequence for both at once.
A Basic Editing Flow
Once you're home, a first editing pass is usually: cull through your frames and discard any with obvious focus or trailing problems before stacking; stack your sky sequence in dedicated stacking software; bring the stacked (or single best) frame into a RAW editor for global adjustments — white balance, an overall exposure/contrast pass, and a modest boost to shadows to pull up dim structure in the core without overdoing it; then finish with more targeted, local adjustments as needed. ORIVON's post-processing workflow guide and post-processing software guide go deeper on this stage — this article won't invent a specific step-by-step edit here, since the right adjustments depend heavily on your actual captured data and the software you're using.
Common Problems and How to Fix Them
- Stars are soft or doubled: focus wasn't actually locked at infinity — redo the manual-focus steps above, and re-verify with a zoomed playback check rather than trusting the lens's focus scale.
- Stars are trailed/elongated: your exposure time was too long for your focal length and sensor's crop factor — shorten it, and recalculate using the crop-adjusted 500 rule or the NPF rule.
- The image is very noisy: ISO was pushed higher than your camera handles well, or you're working from a single frame instead of a stack — try stacking more frames, and check whether a slightly lower ISO with a touch more exposure time (if your trailing limit allows it) gives a cleaner result.
- Condensation/dew on the lens: check your front element periodically in humid conditions — a dew heater band or even a simple hand-warmer strapped near the front of the lens can prevent this from ruining a session partway through.
- The whole sky looks washed out and flat: check the Moon's phase and position for that night, and check for light pollution or thin cloud/haze — this is very rarely a settings problem.
A Short Checklist for the Session
- Confirmed the galactic core will be up, at a usable altitude, during your planned window
- Checked Moon phase and rise/set time for that night
- Camera set to manual mode, shooting RAW
- Batteries charged, spares packed, memory card has space
- Tripod on stable ground, remote shutter or timer ready
- Focus locked on a bright star and verified by zoomed playback
- First test exposure checked for histogram, focus and star trailing before shooting the full sequence
Frequently Asked Questions
No. A camera, a fast wide-angle lens and a sturdy tripod are enough for a genuine first result. A tracker helps with longer exposures and cleaner detail later, but it isn't required to get started.
The 500 rule (500 divided by your lens's focal length) was built around 35mm film and ignores your sensor's crop factor and its actual pixel density. On a cropped sensor, or when you view an image at full resolution or crop into it, trailing that the rule predicted as fine becomes visible. Dividing by your camera's crop factor, or switching to the NPF rule, gives a more reliable number.
A more precise alternative to the 500 rule that factors in your lens's aperture and your sensor's actual pixel pitch, not just focal length. It was developed by Frédéric Michaud for the Société Astronomique du Havre, and several free calculators online will compute it for your exact camera and lens.
You can point a camera at the sky, but a bright Moon washes out the galaxy's faint structure the same way it does for visual observing — the core and dust lanes lose contrast against a brightened sky background. New Moon nights, or at least a Moon that's below the horizon during your session, give meaningfully better results.
There's no strict minimum, but stacking follows diminishing returns tied to the square root of the number of frames — doubling your frame count doesn't double your noise reduction. A common practical starting point for a first Milky Way stack is somewhere in the range of 10 to 20 sky frames, which already gives a real, visible improvement over a single shot.
Sources & Methodology
Exposure fundamentals (aperture, ISO, RAW workflow) reflect standard, widely documented night-photography practice. The 500 rule's film-camera origin and its crop-factor limitation, and the NPF rule's formula and attribution to Frédéric Michaud and the Société Astronomique du Havre, are drawn from published explanations of both methods that are consistent across multiple independent photography references. Seasonal galactic-core visibility patterns by hemisphere reflect general orbital-mechanics-driven seasonality documented across astrophotography planning guides, not a single site-specific measurement — always confirm exact timing for your own date and location with a planning tool rather than this article's general seasonal description. This guide does not present any specific captured photograph, field test or "before/after" result as ORIVON's own; it is a technique explainer, not a field report.